Copy Azure Blobs with Data Factory Event Trigger
By Mike Veazie

NOTE: This article applies to version 2 of Data Factory. The integration described in this article depends on Azure Event Grid. Make sure that your subscription is registered with the Event Grid resource provider. For more info, see Resource providers and types.
Overview
This article builds on the concepts described in Copy Activity in Azure Data Factory. We will be using an event trigger to copy blobs between Azure Storage accounts.
There are scenarios where you need to copy blobs between storage accounts. It could be for another layer of redundancy, or simple to move to a lower tiered storage account for cost optimization. In this article, we will show you how to copy blobs immediately after they are created using Data Factory event triggers.
Prerequisites
1.) Azure Data Factory version
2.) Azure storage accounts for source and destination. Each storage has a container called backups
3.) Event Grid enabled as a resource provider on your Azure subscription
This is what our resource group looks like:
NOTE:
The storage accounts are in the same location to prevent egress charges

Create Linked Storage Accounts
NOTE: Datasets and linked services are described in depth at Datasets and linked services in Azure Data Factory.
In this demo we will use two storage accounts named dfcopyeventsource and dfcopyeventdestination.
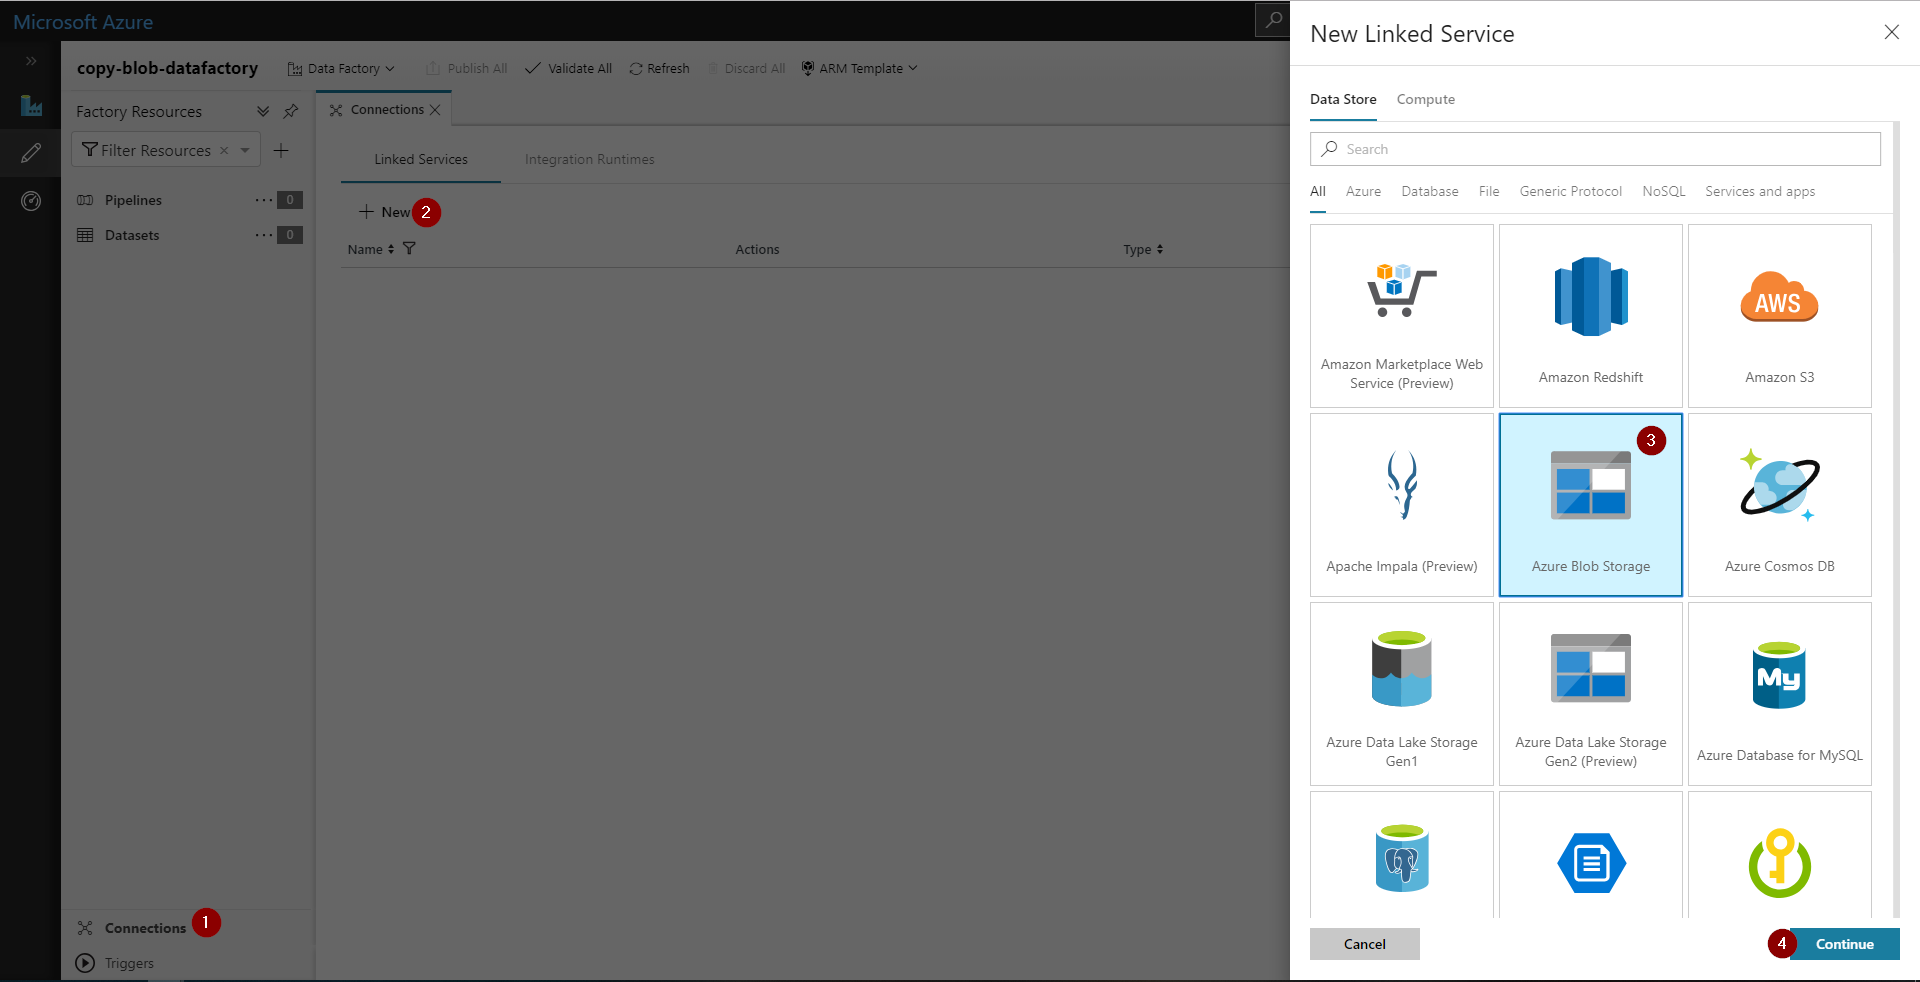
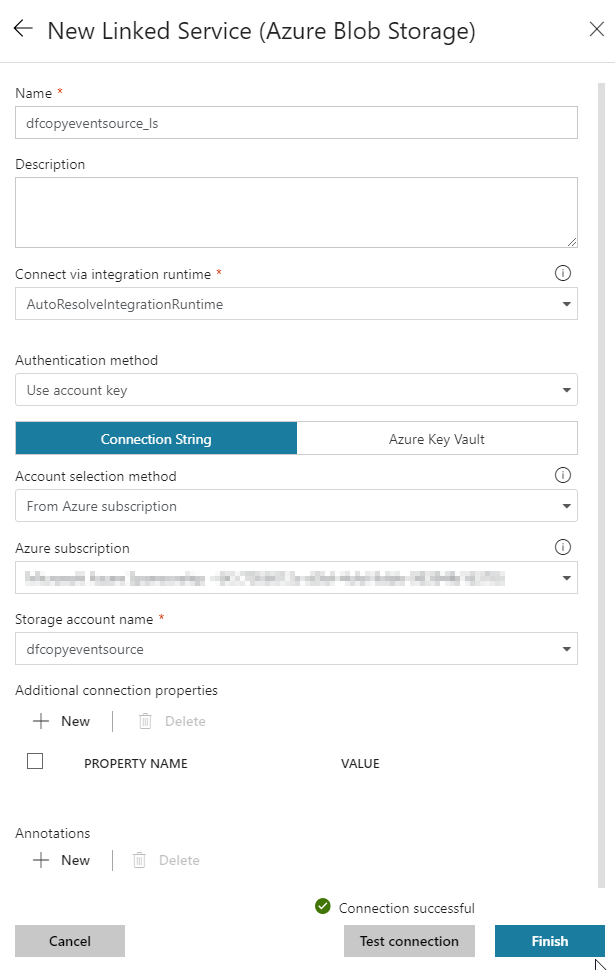
Create linked services for both storage accounts in Data Factory under the connections tab. For simplicity we will just use the storage account account key for authentication. We will just add a _ls suffix to these so we they are linked services later.
Select "Use account key" for authentication method
Both storage accounts are now linked.

Create Datasets
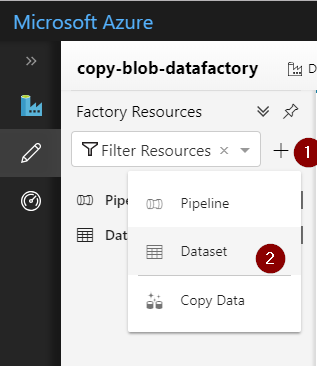
Now we will create a Dataset for each storage account with _ds as a suffix. For simplicity, use binary copy. Be sure to add the path backups.
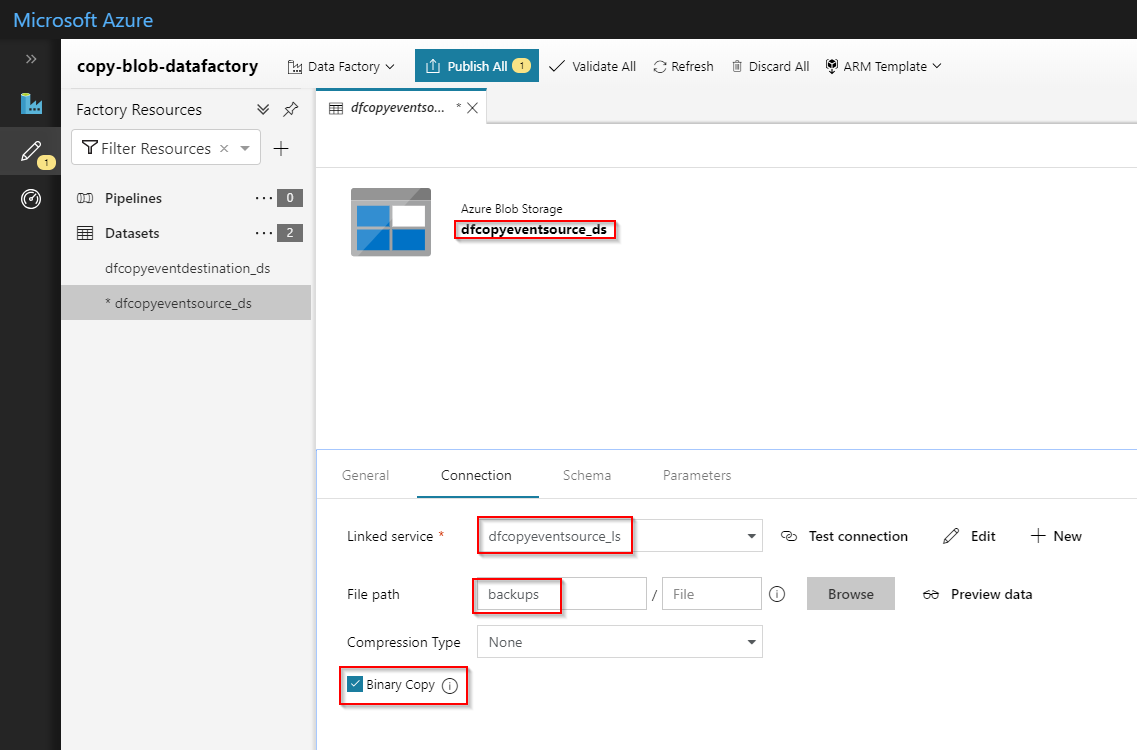
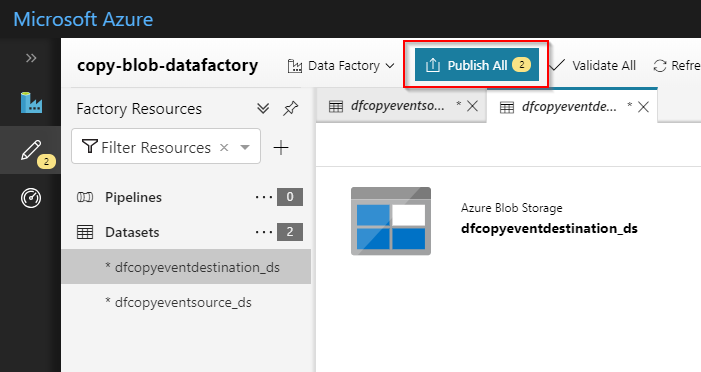
Publish the Datasets
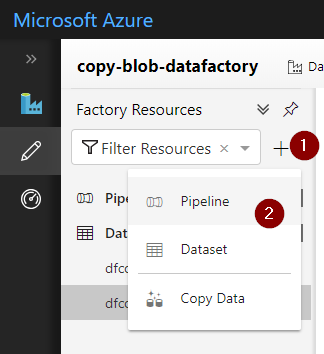
Create Pipeline
Now we will create a Pipeline and add the Copy Data activity. Our pipeline is called copy_blob_pipeline.
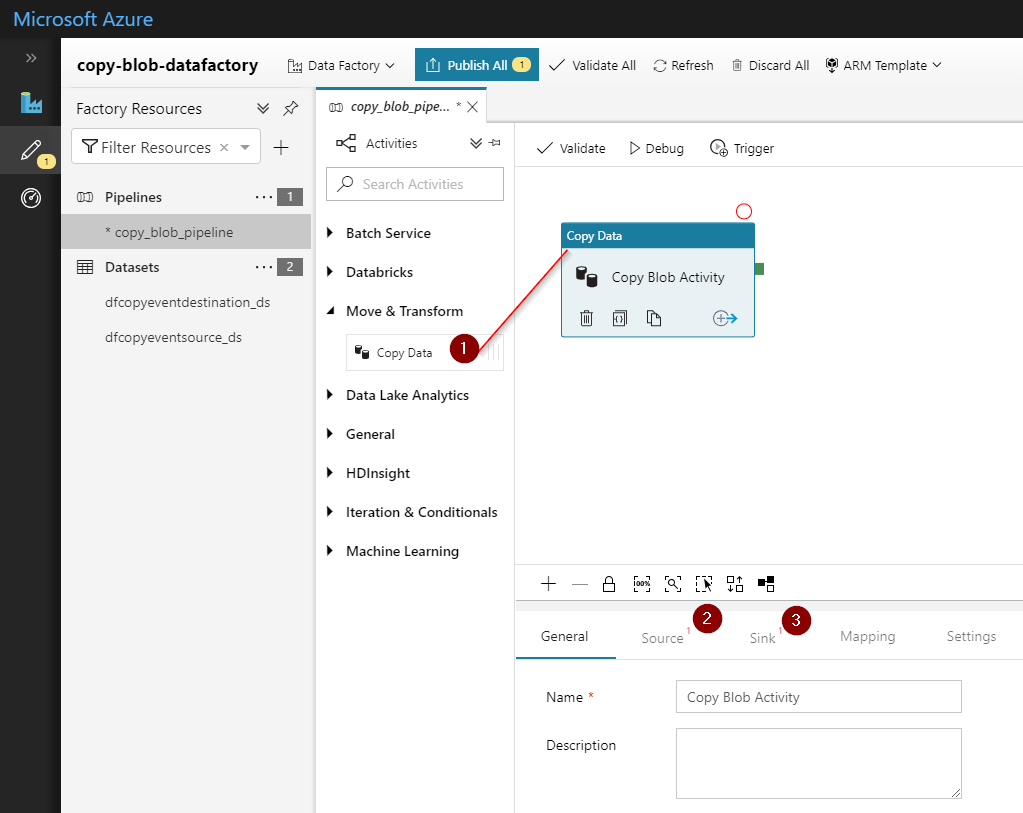
Drag the Copy Data activity onto the canvas.
1.) Name it Copy Data Activity
2.) Select source Dataset
3.) Select destination Dataset (sink)

Testing Pipeline
Publish all resources and your Pipeline should be ready to test. We will add event triggers after confirming the copy data activity works as expected.
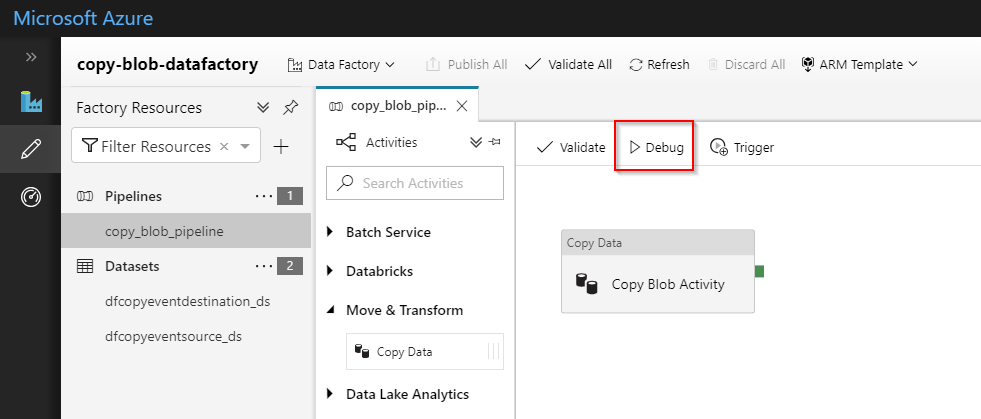
Take the following steps to test the Pipeline
1.) Upload test data to source storage account
2.) In Data Factory, click the Debug button
3.) Verify the pipeline finishes without error and the data was moved to the destination



Adding Event Trigger
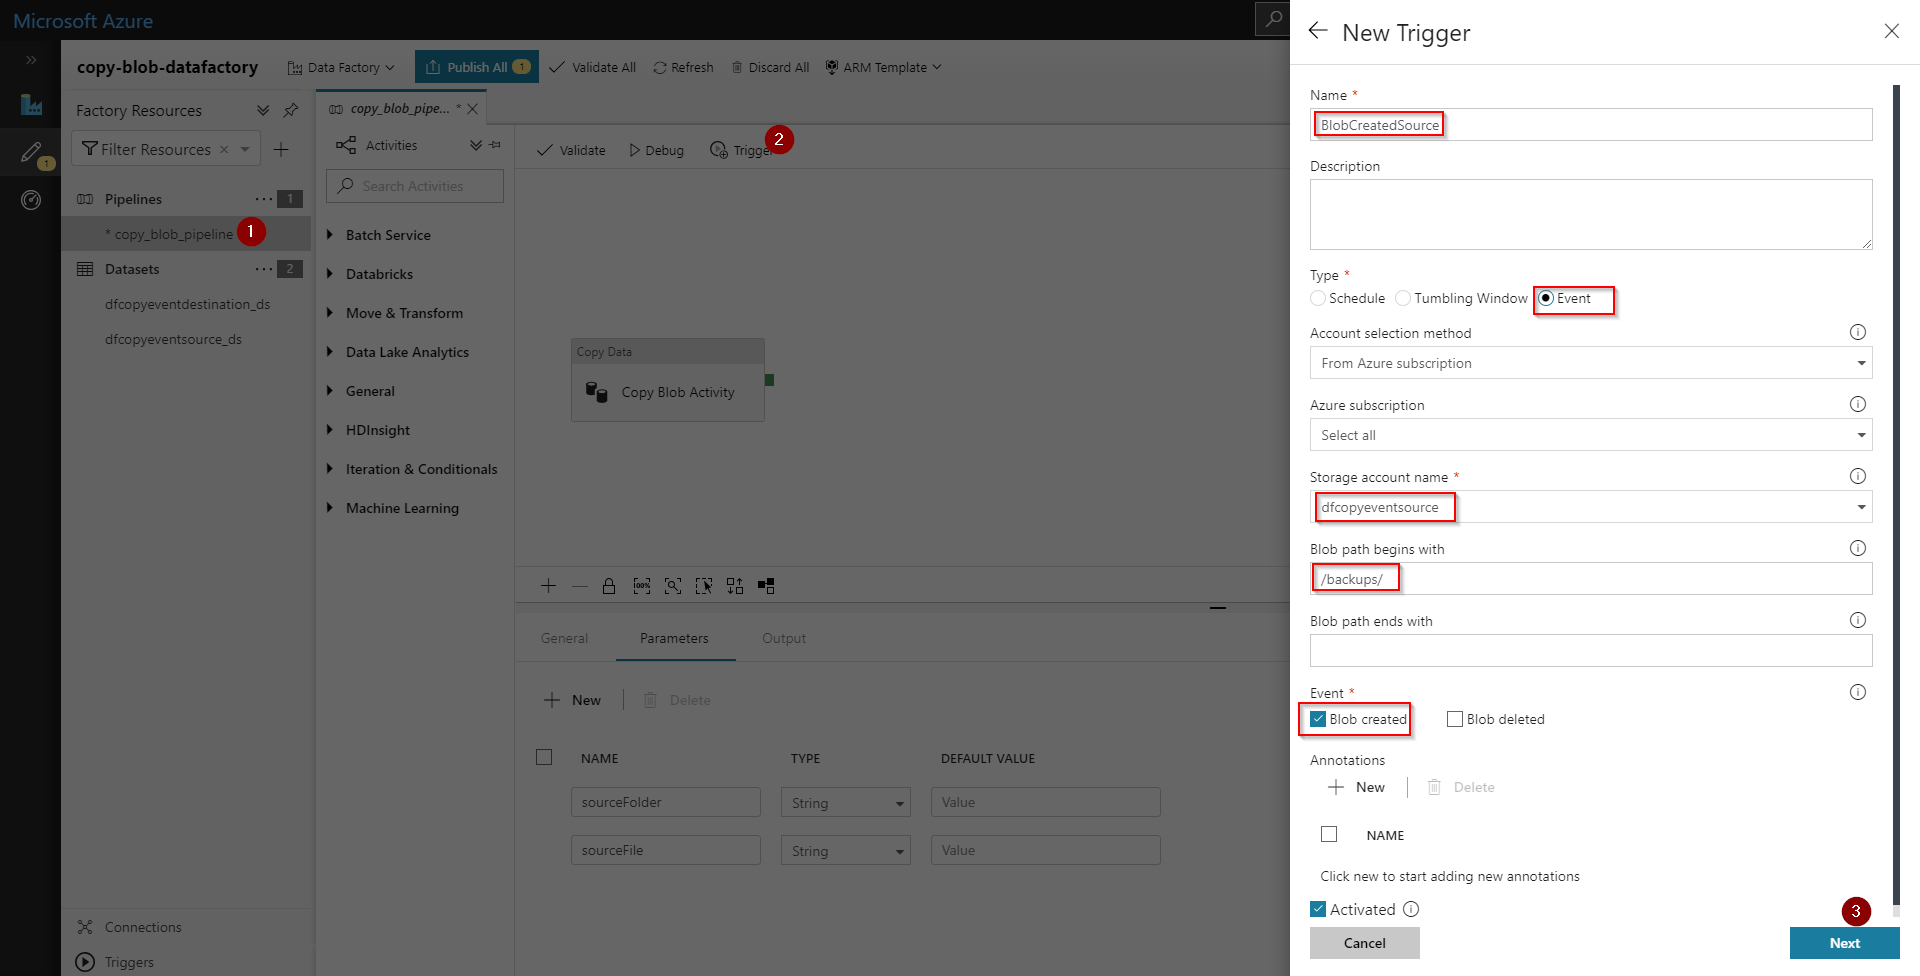
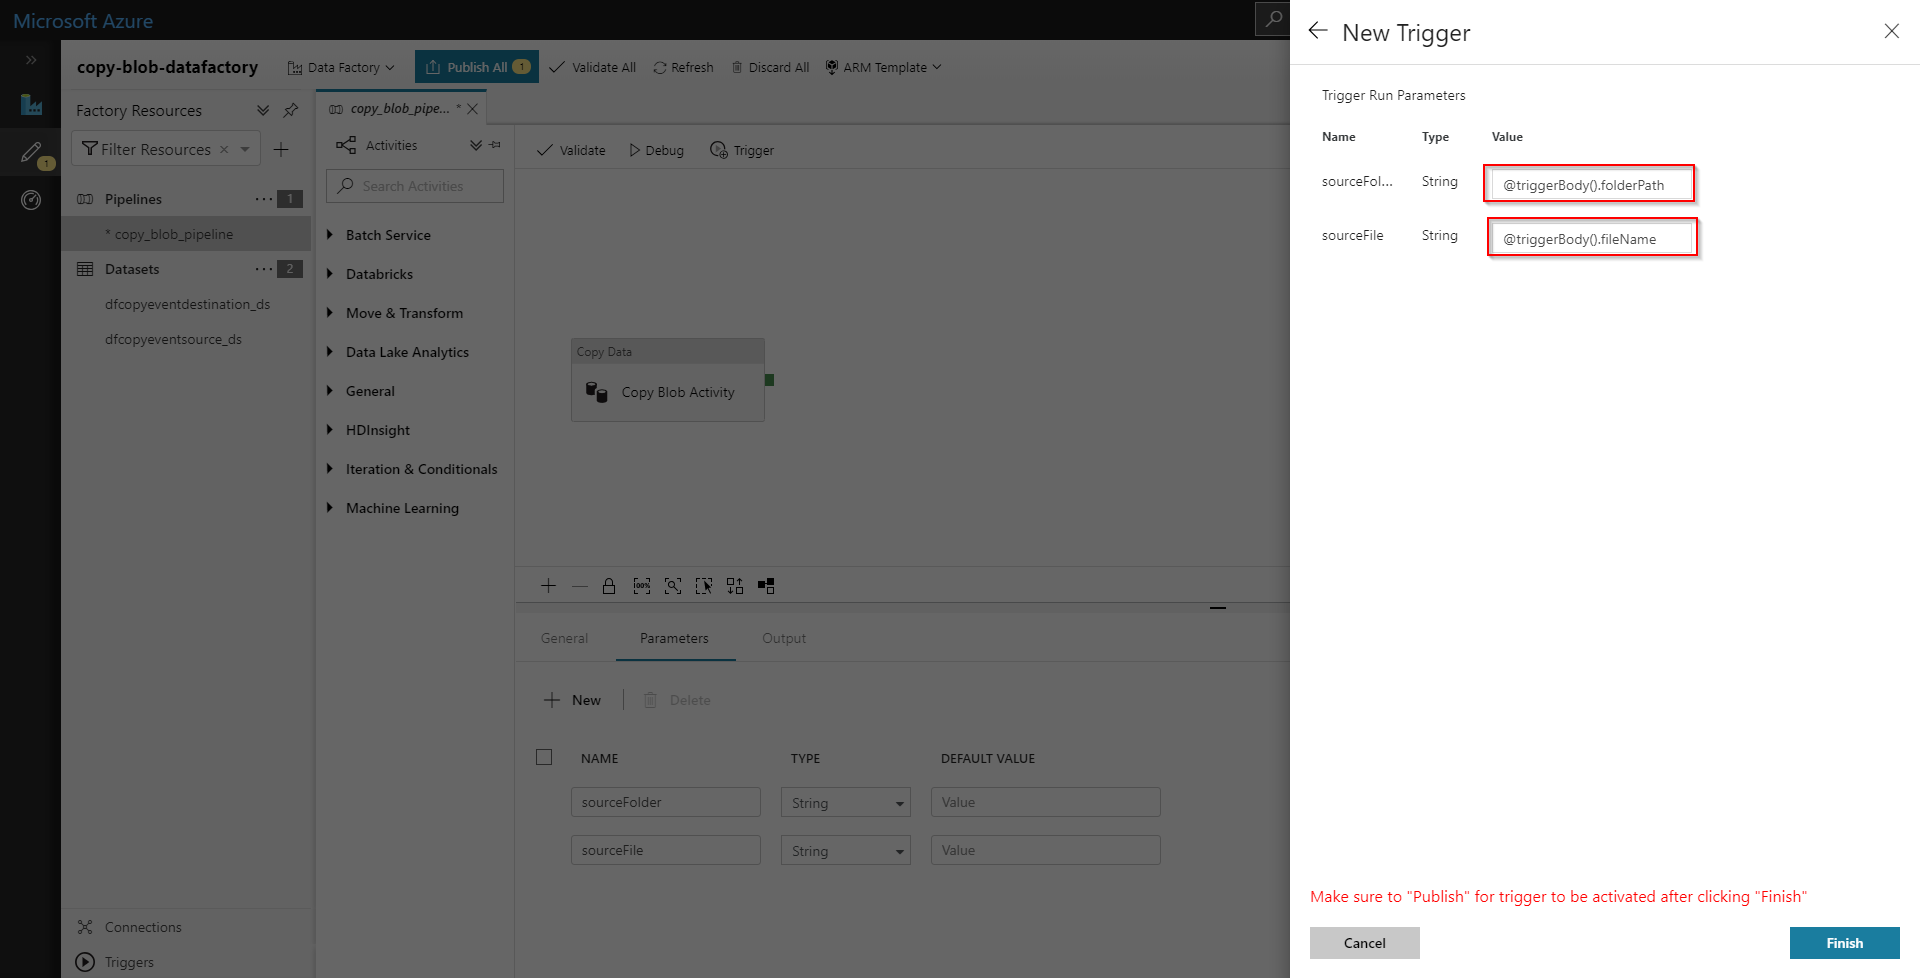
We will be adding a Blob Created event trigger to the copy_blob_pipeline. It will watch the source storage account under the backups container for new blobs, and then copy only the new blobs to the destination storage account. To accomplish this, we need to parameterize our Pipeline and source Dataset. The event trigger will inject information about the blob into our parameters at runtime.
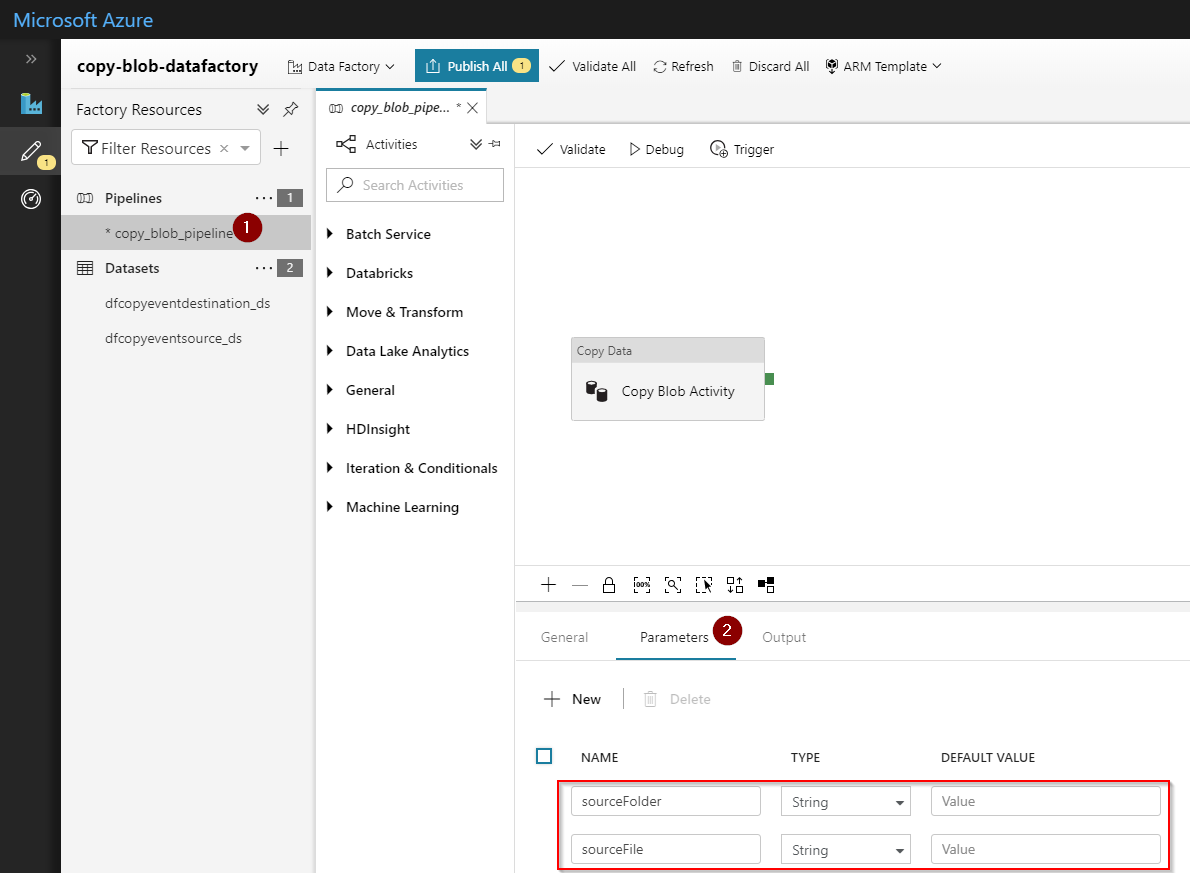
Parameterize Pipeline
Edit the copy_blob_pipeline and add two parameters:
1.) sourceFolder
2.) sourceFile
Add Event Trigger with Parameters
We'll create the event trigger and configure it to inject the new blob sourceFolder and sourceFile into the pipeline parameters we just created.
Parameterize Source Dataset
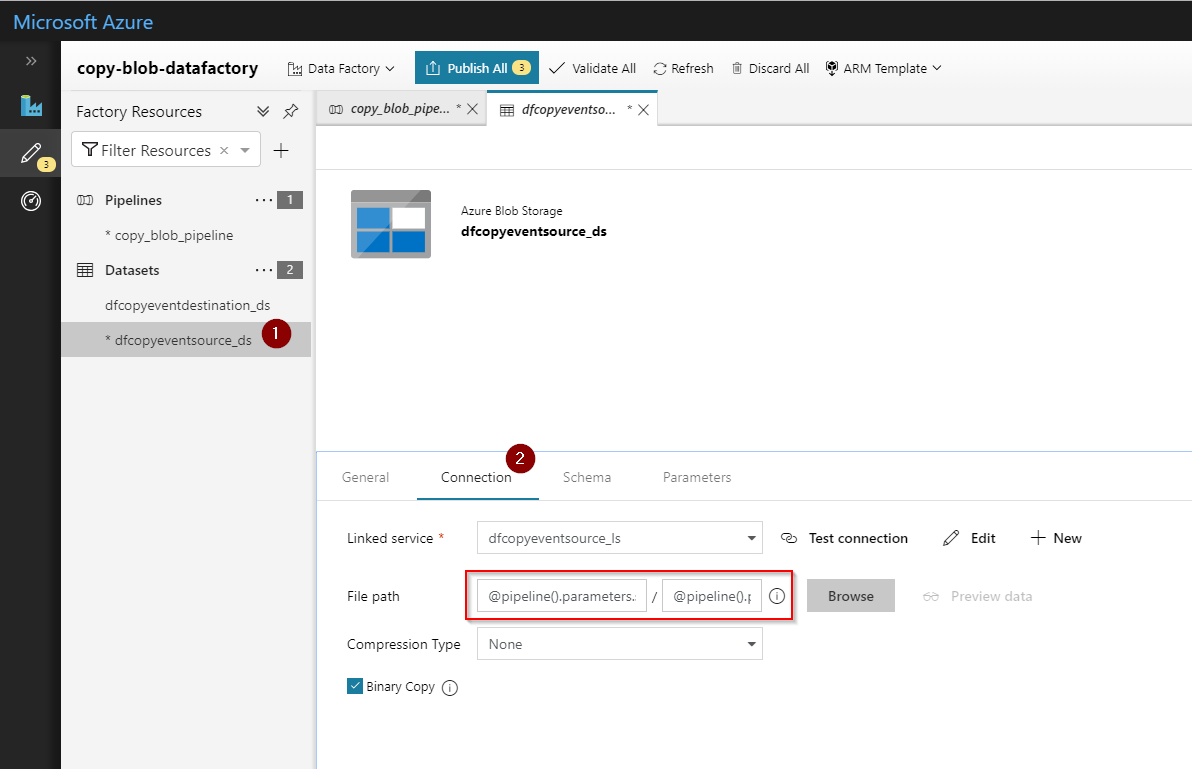
The final step is to parameterize the source Dataset dfcopyeventsource_ds. On the Connection tab, add @pipeline().parameters.sourceFolder and @pipeline().parameters.sourceFile to their respective input boxes.
Testing Trigger
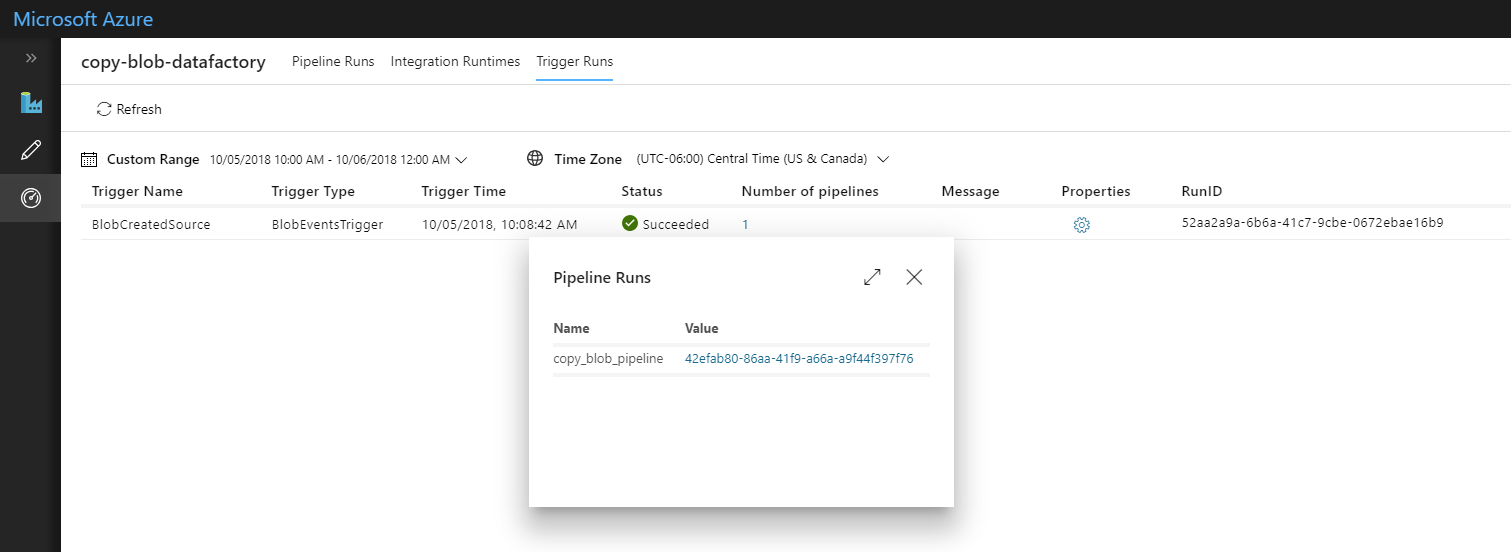
Publish All and the Event Trigger will be live and watching the source storage account. Upload a file to the source and then view the monitoring tab to validate the pipeline executed without issues. If all is configured correctly, the blob will be copied to the destination storage account.
